
Repotting a water lily can be a daunting task, but it is essential to keep your lily healthy and thriving. Repotting a water lily ensures that the root system is healthy and that the plant is receiving the correct amount of nutrients and soil.
This guide will explain the steps needed to repot a water lily correctly and safely. With the right preparation and care, your water lily will be back in its new pot in no time!
Gather Supplies
Blogging is an important part of the marketing mix, and it can help you establish your brand, reach potential customers and share your company’s message. Gathering the right supplies is key to successful blogging.
You’ll need to determine the right platform for your blog, select the topics you want to discuss, and create compelling posts that will engage your audience. You’ll also need to think about the visuals you’ll use to support your posts, such as images, videos, or GIFs.
Finally, you’ll need to ensure you have the resources and tools to measure the success of your blog – this could include measuring website traffic, tracking post engagement, and monitoring reader comments. By gathering the right supplies for your blog, you can ensure it has maximum impact.
Prepare the Plant
The blog “Prepare the Plant” is the perfect resource for those looking to cultivate a green lifestyle. Whether you’re a beginner or a seasoned gardener, this blog can provide tips, tricks, and advice on how to prepare your plants for success.
From the basics of soil preparation and fertilization to the more advanced techniques of container gardening, this blog has it all. In addition to gardening tips, you’ll find creative ideas for using herbs and plants in your everyday life.
Whether you’re looking to spruce up your balcony or just want to add some natural beauty to your home, this blog is a great source of inspiration. With a combination of expert knowledge and a playful sense of humor, “Prepare the Plant” is sure to help you get the most out of your garden.
Remove the Plant from the Pot
Removing a plant from its pot can be an intimidating task that can be easily accomplished with a few simple steps. First, turn the pot upside down and tap the base firmly. This should loosen the soil and allow for the plant roots to be freed.
Next, gently grasp the plant’s stem and pull it out of the pot. If the plant is stubbornly stuck, you can try running a knife around the edges of the pot and/or lightly squeezing the pot to help release the plant.
Lastly, inspect the root system and remove any excess soil or debris that may be attached. With the proper know-how, removing a plant from its pot doesn’t have to be a hassle any longer.

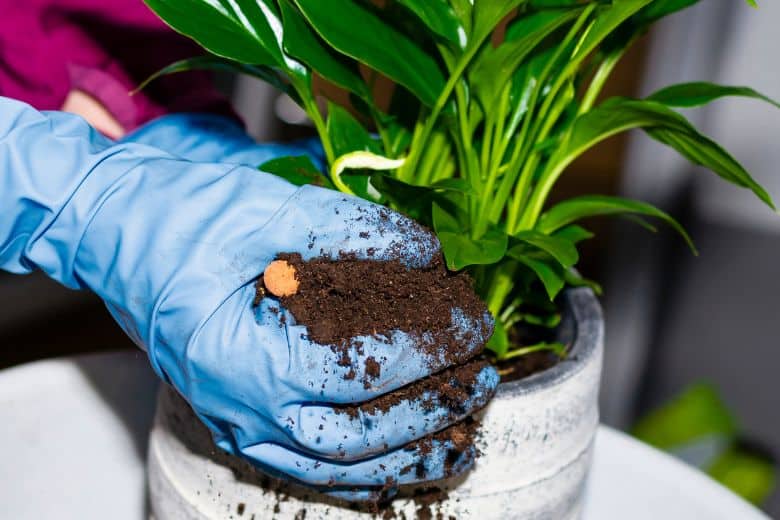
Add New Potting Mix
Potting mix is an essential element for a successful garden. It helps retain moisture, encourages root growth, and provides essential nutrients for your plants. Adding new potting mix to your garden can give your plants the extra boost they need to thrive.
It’s easy to do, and with a few simple steps, you can have your garden looking better than ever.
Start by loosening the soil around your plants, then add a generous layer of new potting mix to the area.
Finally, water your plants thoroughly and you’re done! Adding new potting mix to your garden can be a quick and easy way to revive your plants and give your garden a fresh look.
Place the Plant in the New Pot
When it comes to planting, the right pot can be just as important as the plant itself. A pot that is too small can cause a plant to become root bound, while one that is too large can lead to overwatering and root rot.
To ensure the health of your plants, make sure to repot them in the correct sized containers. Start by finding a pot that is just slightly larger than the current one and has plenty of drainage holes. Moving a plant into a new pot can be a tricky process, but with a little bit of know-how, it’s easy to do it right.
Start by gently removing the plant from the old container, making sure to keep as much of the original soil as possible. Then, add fresh soil to the new pot and carefully place the plant in the center.
Finally, water and cover with a layer of mulch to help retain moisture. With the right pot and a little bit of TLC, you can be sure that your plants will thrive.
Water and Place in Sunlight
Water and Place in Sunlight is a blog dedicated to exploring the ways that water and sunlight interact with our environment. We look at the science behind how water and sunlight have a powerful and positive impact on our lives.
From using water to clean and purify our air, to harnessing the sun’s energy to generate electricity, this blog will explore the many ways these two elements work together to make a difference in the world.
We’ll also discuss the importance of conservation and sustainability, and how we can all do our part to make a positive difference.
Whether you’re a scientist, an enthusiast, or just looking to learn more about how water and sunlight shape our world, Water and Place in Sunlight is the perfect place to start.
FAQs About the How to Repot a Water Lily
What kind of container should I use to repot my water lily?
Answer: It is best to use a container that is made of plastic or terracotta. The container should have plenty of drainage holes in the bottom and should be at least 8-10 inches deep.
What kind of soil should I use when repotting my water lily?
Answer: Use a soil that is specifically designed for aquatic plants, such as an aquatic potting mix. Make sure that the soil is not too compact and that it drains well.
How often should I repot my water lily?
Answer: Water lilies should be repotted every one to two years, or when the roots become pot-bound. It is best to repot in the spring or early summer months.
Conclusion
In conclusion, repotting a water lily is a relatively easy task with a few simple steps. First, remove the water lily from its current pot and rinse the roots in water. Then, trim the roots and place the lily in a container with fresh soil and adequate drainage. Finally, fill the pot with water and make sure the lily is completely submerged. With proper care and repotting, your water lily should thrive for years to come.