

Have your peace lily struggling with root rot? Don’t lose hope; you can save your plant from this deadly fungal disease with the right treatment and care. Root rot is a common problem peace lilies face, and all you need to know is the process of how to save a peace lily from root rot.
With that said, we have included a few simple steps that can help nurse your lily back to full health: identify the symptoms of root rot in peace lilies like wilted leaves, trim off any mushy or diseased roots, repot in fresh sterile soil, and improve drainage and moisture levels going forward.
By identifying the causes and symptoms of root rot early and taking prompt action, you have a good chance of saving your peace lily. Here are the key steps to follow if you think your peace lily may be suffering from root rot.
What Causes Root Rot in Peace Lily?
Root rot occurs when the roots become saturated in water for extended periods of time, creating the perfect wet environment for harmful fungi and bacteria to grow. Common causes of root rot include:
- Overwatering: Peace lilies like to dry out slightly between waterings. Waterlogging the soil by letting it sit soggy promotes root rot.
- Poor Drainage: If the soil doesn’t drain well and allows excess water to move through and out of the pot efficiently, it will accumulate around the roots.
- Low Light: Peace lilies fare best in medium to bright, indirect light. Low light can lead to excessive watering as the plant isn’t as actively growing.
- Compacted Soil: Dense, packed soil prevents water from properly draining through the root zone.
- Low Temperature: Peace lilies grow best between 65-80°F. Temperatures below 60°F can weaken the plant and make it more susceptible to root rot.
Recognizing Root Rot Symptoms
Identifying root rot early is key to saving your peace lily. Look for the following warning signs:
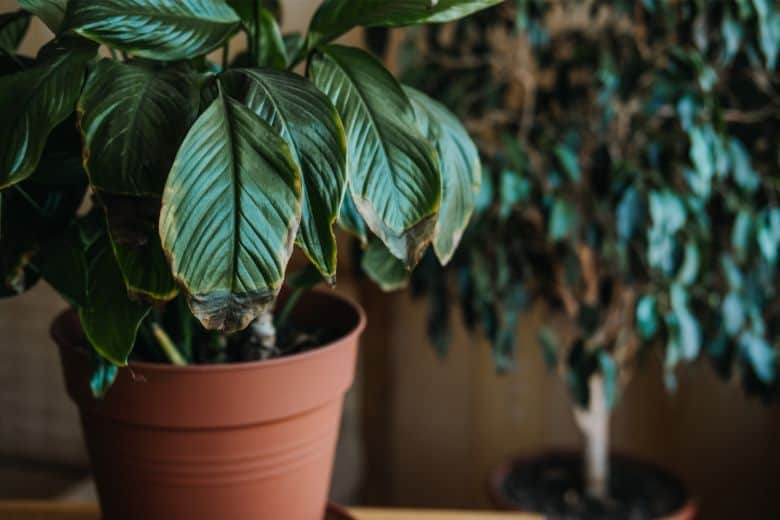
- Wilting leaves: The plant will appear droopy, and leaves will start to yellow even when the soil is still moist.
- Brown, mushy roots: Gently tug on the plant to check root health. Diseased roots will feel slimy and break off easily.
- Poor growth: Leaf and flower production stalls or stops as the plant struggles to uptake water and nutrients.
- Foul odor: Rotting roots release an unpleasant stench when squeezed.
- Yellow or brown leaf spots: A symptom seen later in infection as the rot spreads upward.
Taking Action Against Root Rot
If you notice these symptoms, don’t delay in taking action. The longer root rot is left to progress, the poorer the plant’s chances of recovery. Follow these steps:
# Isolate the plant: Move it away from other houseplants in case the fungus spreads.
# Remove from soil: Carefully pull the plant up from the pot without damaging the roots more than necessary.
# Trim rotted roots: Use clean, sharp scissors or pruners to cut away any mushy, darkened roots. Trim at least 1⁄2 inch beyond where the rot is visible.
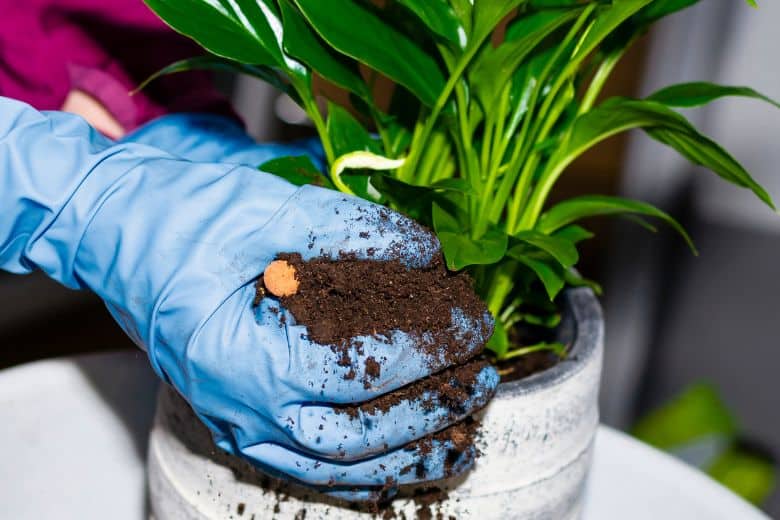
# Report in new soil: Use a fresh, well-draining potting mix free of debris and pests. A container with drainage holes is important.
# Allow to dry: Water very sparingly for at least a few weeks until new roots have started to grow. Stick your finger an inch into the soil to check moisture levels before watering.
# Care for recovery: Place in indirect light and warmth. Mist leaves occasionally to keep humidity levels up. Fertilize monthly with half-strength during recovery.
# Check for new growth: Be patient as the plant re-establishes its root system. New shoots will emerge within a few months with proper care.
# Prevent future root rot: Adjust your watering routine going forward and make sure the plant has optimal growing conditions to stay healthy.
Treating the Soil
If the root rot is severe, it’s wise to sterilize or replace the existing potting mix. Here are some soil treatment options:
- Soak the pot and soil in a 10% bleach solution for 10 minutes, then rinse thoroughly before replanting.
- Bake contaminated soil at 180°F for 30 minutes to kill pathogens.
- Replace all old soil with fresh, sterile potting mix when repotting.
- As a preventative measure, incorporate sand or perlite into potting mixes to improve drainage.
The key is eliminating any remaining fungal spores or infected debris that could reinfect new roots. This gives your peace lily the best chance to recover fully without setbacks.
Avoid Making These Common Mistakes
Following proper root rot treatment is important, but prevention is always preferable to having to save your plant in the first place. Avoid these moisture-related errors:
- Letting the soil dry out too much between waterings. Keep it consistently moist but not soggy.
- Leaving water in the drainage tray and not emptying it after 30 minutes.
- Frequently watering on a schedule without checking soil moisture levels first.
- Potting in soil without added components like bark or perlite for better drainage.
- Locating the plant where humidity levels are too low.
Replanting a Peace Lily After Treating Root Rot
If the root rot treatment was successful, it’s time to replant the peace lily into fresh potting soil. With the right knowledge, you can easily replant a peace lily and restore it to its former glory. Follow the steps:
Step 1: Choose a New Container
Select a container that is only slightly larger than the existing root ball. Terra cotta or plastic pots work best to allow for drainage. Wash the new pot thoroughly with soap and water.
Step 2: Prepare Well draining Soil
Use a soil mix specifically designed for moisture-loving houseplants. It should contain materials like peat moss or coir to improve drainage and aeration for the roots. Sterilize any soil before replanting to kill potential pathogens.
Step 3: Plant Gently
Handle the roots carefully as you place the plant in the center of the new pot. Gently spread out the roots so they are not crowded or circling. Make sure the base of the stem is slightly above the soil level.
Step 4: Fill in Around the Roots
Add the sterilized potting soil around the peace lily roots and stem base. Press it down firmly so the plant is stable but not packed in tightly. Leave a small well near the stem to direct water away.
Step 5: Water Lightly At First
Water the replanted peace lily lightly at first to settle the soil around the rootball. Resist the urge to overwater as new roots develop. Keep the soil damp but not soaked to avoid creating conditions for rot to return.
Step 6: Monitor Moisture Closely
Check soil moisture daily by sticking your finger an inch into the pot. Only water when the topsoil is dry. Catching any wilt or yellow leaves early is key to continued recovery.
Step 7: Gradual Care is Best
Increase water slightly as new growth appears. Fertilize monthly in the growing season once a plant is established. Avoid direct sun and give the peace lily time to regain strength with TLC after the root rot battle. Proper care after replanting gives the best chance of full recovery.
With careful attention to drainage, moisture levels, and growing conditions after replanting, peace lilies that received treatment for root rot can often make a full recovery and return to healthy, flowing growth. Consistent monitoring is still advised to watch for any recurrence of issues.
Conclusion
With diligent treatment and improved long-term care, it’s definitely possible to nurse a peace lily back to health after a bout of root rot. Be patient as new roots develop over several weeks. As long as you catch the problem early, the plant has a good chance of full recovery with the right TLC. Let the soil dry out between waterings while it heals up. With luck, your peace lily will be back in bloom before you know it!


6 Comments